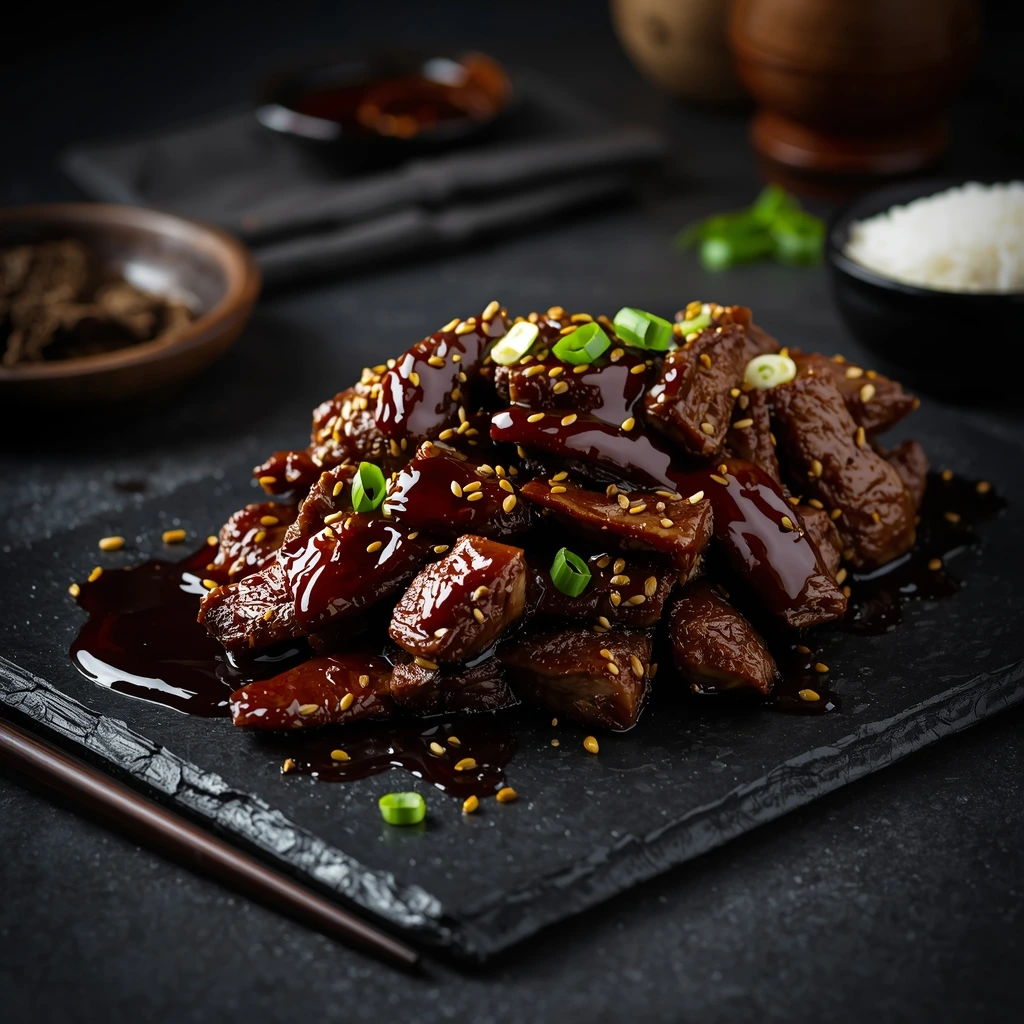
Quick Mongolian Beef (PF Chang’s Copycat Recipe)
Introduction
If you’ve ever ordered Mongolian beef at PF Chang’s and wondered if you could make it at home, I have great news: you absolutely can, and it’s even better than the restaurant version!
This recipe delivers that perfect combination of crispy beef pieces coated in a glossy, sweet-savory sauce with hints of garlic and ginger. And the best part? It takes only 20 minutes from start to finish.
Table of Contents
Why This Mongolian Beef Recipe Works
The secret to restaurant-quality Mongolian beef at home is the technique: coating the beef in cornstarch and frying it creates that signature crispy exterior that holds onto the sauce beautifully.
The sauce itself is a simple but magical combination of soy sauce, brown sugar, and aromatics. It’s not complicated, but when done right, it’s absolutely crave-worthy.
Restaurant Quality at Home
I’ve spent years perfecting this copycat recipe, and I can confidently say it tastes just like PF Chang’s—maybe even better because you can control the sweetness and spice level to your preference.
Plus, making it at home means you know exactly what’s going into your food, and you’ll save money in the process!
## Ingredients for Mongolian Beef
For the Beef
– 1.5 lbs flank steak, sliced into thin strips
– 1/2 cup cornstarch
– Vegetable oil for frying (about 1/2 cup)
For the Sauce
– 1/2 cup low-sodium soy sauce
– 1/2 cup water
– 2/3 cup dark brown sugar, packed
– 1 teaspoon fresh ginger, grated
– 3 cloves garlic, minced
– 1/4 teaspoon red pepper flakes (optional)
– 1 tablespoon cornstarch mixed with 2 tablespoons water
Aromatics and Garnish
– 5-6 green onions, cut into 2-inch pieces
– 1 teaspoon sesame seeds
– Extra green onions, sliced for garnish
Step-by-Step Mongolian Beef Instructions
Step 1: Coat and Fry the Beef
Start by slicing your flank steak against the grain into thin strips, about 1/4 inch thick. Place the beef strips in a large ziplock bag or bowl with the 1/2 cup of cornstarch.
Seal the bag and shake vigorously, or toss in the bowl, until every piece of beef is evenly coated with cornstarch. Let it sit for a few minutes while the cornstarch absorbs any moisture—this helps create a crispier coating.
Heat about 1/2 cup of vegetable oil in a large wok or deep skillet over medium-high heat. You want the oil to be around 350°F—test by dropping in a small piece of beef; it should sizzle immediately.
Working in batches (don’t overcrowd!), carefully add the beef strips to the hot oil. Fry for 2-3 minutes, turning once, until golden brown and crispy on all sides.
Remove the beef with a slotted spoon and drain on paper towels. Repeat with remaining beef. Set aside.
Step 2: Make the Mongolian Sauce
While the beef rests, prepare your sauce. In a medium bowl, whisk together the soy sauce, water, and brown sugar until the sugar dissolves completely.
The sugar should be fully incorporated—no lumps! Taste the sauce at this point. If you like it sweeter, add more brown sugar. If you want it less salty, add a splash more water.
Step 3: Sauté Garlic and Ginger
Pour out most of the frying oil, leaving just about 1 tablespoon in the wok or skillet. Heat over medium heat.
Add the minced garlic and grated ginger. Stir-fry for about 30 seconds until fragrant but not browned—you want to release the aromatics without burning them.
If using red pepper flakes for heat, add them now and stir for another 15 seconds.
Step 4: Combine Beef and Sauce
Pour the sauce mixture into the wok with the aromatics. Bring to a simmer over medium-high heat.
Add the cornstarch slurry (1 tablespoon cornstarch mixed with 2 tablespoons water) and stir constantly for about 1-2 minutes. The sauce will thicken dramatically and become glossy—this is exactly what you want!
Add the fried beef and green onion pieces to the sauce. Toss everything together, making sure each piece of beef is coated in that beautiful, thick sauce.
Cook for just 1-2 minutes more, tossing constantly. The beef should be well-coated and the green onions slightly softened but still bright.
Step 5: Garnish and Serve
Remove from heat immediately—you don’t want to overcook the beef or it will become tough.
Transfer to a serving platter and garnish with sesame seeds and extra sliced green onions.
Serve immediately over steamed white rice or fried rice.
Pro Tips for Crispy Mongolian Beef
The Secret to Crispy Beef
The crispy texture comes from three key factors:
1. **Dry the beef** – Pat it completely dry before coating
2. **Cornstarch coating** – Make sure every piece is thoroughly coated
3. **Hot oil** – The oil must be hot enough to fry, not steam the beef
4. **Don’t overcrowd** – Fry in batches so the temperature doesn’t drop
If your beef isn’t crispy enough, the oil probably wasn’t hot enough or you added too much beef at once.
How to Get Restaurant-Style Sauce
The sauce should be thick, glossy, and cling to the beef—not watery and thin. Here’s how to achieve that:
– **Don’t skip the cornstarch slurry** – This is what thickens the sauce
– **Let it simmer** – Give the cornstarch time to activate and thicken
– **Stir constantly** – Prevents lumps and ensures even thickening
– **Coat at the end** – Add the beef just before serving so it stays crispy
Variations You’ll Love
**Spicier version:** Double the red pepper flakes or add 1-2 teaspoons of sriracha to the sauce.
**Honey Mongolian beef:** Replace half the brown sugar with honey for a different sweetness profile.
**Extra vegetables:** Add sliced bell peppers, snap peas, or broccoli florets along with the green onions.
**Different proteins:** Try this same recipe with chicken breast, shrimp, or even tofu.
**Less sweet:** Reduce the brown sugar to 1/2 cup for a more savory version.
**Gluten-free:** Use tamari instead of soy sauce and ensure your cornstarch is certified gluten-free.
Serving Ideas for Mongolian Beef
This dish is perfect over:
– **Steamed white rice** – The classic choice
– **Brown rice** – For a healthier option
– **Fried rice** – Makes it a complete meal
– **Cauliflower rice** – For low-carb diets
– **Rice noodles** – A fun variation
– **Crispy chow mein noodles** – Extra texture!
**Complete the meal with:**
– Egg rolls or spring rolls as appetizers
– Hot and sour soup
– Cucumber salad with sesame dressing
– Steamed edamame
– Fortune cookies for dessert!
Storage and Reheating Guide
**Refrigerator:** Store in an airtight container for up to 3 days. The beef will lose some crispiness, but it will still taste delicious.
**Freezing:** I don’t recommend freezing this dish, as the texture of the beef changes significantly when frozen and reheated.
**Reheating:**
– **Stovetop (best method):** Heat in a skillet over medium-high heat with a splash of water, tossing frequently until hot.
– **Microwave:** Heat in 30-second intervals, stirring between each, until heated through. Add a tiny splash of water if the sauce has thickened too much.
– **Oven:** Spread on a baking sheet and heat at 350°F for 10-15 minutes.
**Pro tip:** For crispiest reheating, use the stovetop method with a bit of oil in a hot pan!
Conclusion
This quick Mongolian beef recipe proves you don’t need to order takeout to enjoy restaurant-quality Chinese food. In just 20 minutes, you can create a dish that’s crispy, saucy, and absolutely delicious.
The combination of tender beef with a crispy coating, sweet-savory sauce, and aromatic ginger and garlic is simply irresistible. And unlike restaurant versions, you can adjust the sweetness and spice exactly to your liking.
Once you make this recipe, I guarantee it’ll become a regular in your dinner rotation. It’s that good, that easy, and that addictive.
Give it a try tonight—your taste buds will thank you!